Page 79 of 102
Re: Show your models thread...(IMAGE HEAVY)
Posted: 2012-03-26 04:39
by Spyker2041
'[R-CON wrote:Tim270;1739473']Starting to scratch a itch I have had for a while.... keeping it a little under wraps for now


Civil war cannon for insurgents? XD
Re: Show your models thread...(IMAGE HEAVY)
Posted: 2012-03-26 09:30
by Rhino
Surround wrote:* I added a buggy baked version of it. Does anybody have idea why the baking gave those funny edges?
Most likley down to a combination of smoothing and UVs, but most likely mainly smoothing:
'[R-DEV wrote:Rhino;1714667']The next big thing you need to keep in mind is that you can't stich bits of the model together with diffrent smoothing groups. If you have your UVs stiched together your normal (bump) maps will not come out right and there will be a big line/seem on the stiched part where two diffrent smothing groups meet.
Here's a quick example just encase your not sure what I'm on about using the butt of the SA80 rifle.
First of all the Smoothing groups, the top face uses smoothing group 3 (shown in blue) while the back (and underside) of the rifle uses smoothing group 2 (shown in red). As you can see the two smoothing groups meet at the very top of the back of the rifle.
Here is the stiched UV:
And in the render of the model after its been baked with a stiched UV, we can see a big black seam across where the two smoothing groups meet.
Now here the un-stiched UV:
And in the render of the model after its been baked with an un-stiched UV, we can see a big black seam across where the two smoothing groups meet.

Stiching UVs is something on a normal UV that is not having a texture baked to is something you should do at every oppitunity to make it as easy for the texture artist as possible to match up the textures on diffrent parts of the model. While this is some what still true for baking textures you should still stich up the UVs as much as possible, just dont stich up the UVs between two diffrent smoothing groups so make sure you know where your smoothing groups are and that you do not stich them up otherwise your normals are going to look totally rubbish and nothing like as good as they would otherwise. Even thou your UVs are not stiched, you can still put the faces that would be joined together much closer to each other than you would for a normal UV as any texture bleeding wont matter because the textures are the same on both sides, just make sure you have the right faces, the right way round next to each other. Simplest way to do this is to stich up your UVs then brake them at the points between two diffrent UVs.
The simplest solution is just to smoothing all your low poly and high poly under smoothing group 1 (HP should be anyways) and while it might look really odd before baking, after it it should be good.
Re: Show your models thread...(IMAGE HEAVY)
Posted: 2012-03-26 12:23
by Surround
Yep, i had bad smoothing groups in the low poly
Re: Show your models thread...(IMAGE HEAVY)
Posted: 2012-03-26 15:06
by Pvt.LHeureux
ubermensche wrote:Hahaha yeah I hear ya. Well I just began to work on the turret and the chassis. And didn't pay much attention to it details yet. Anyways here's where I'm at now:

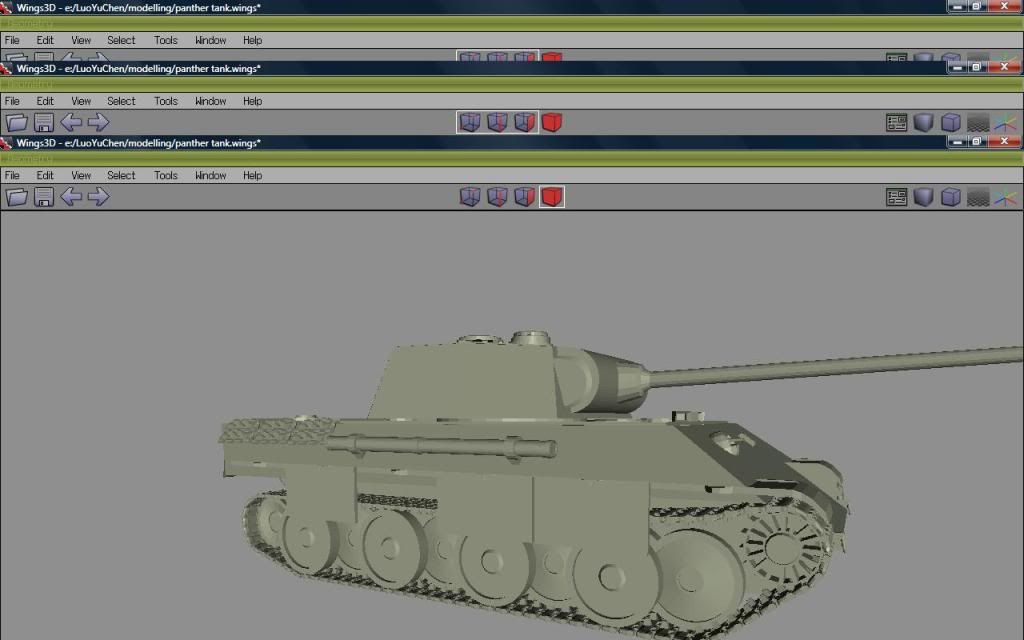
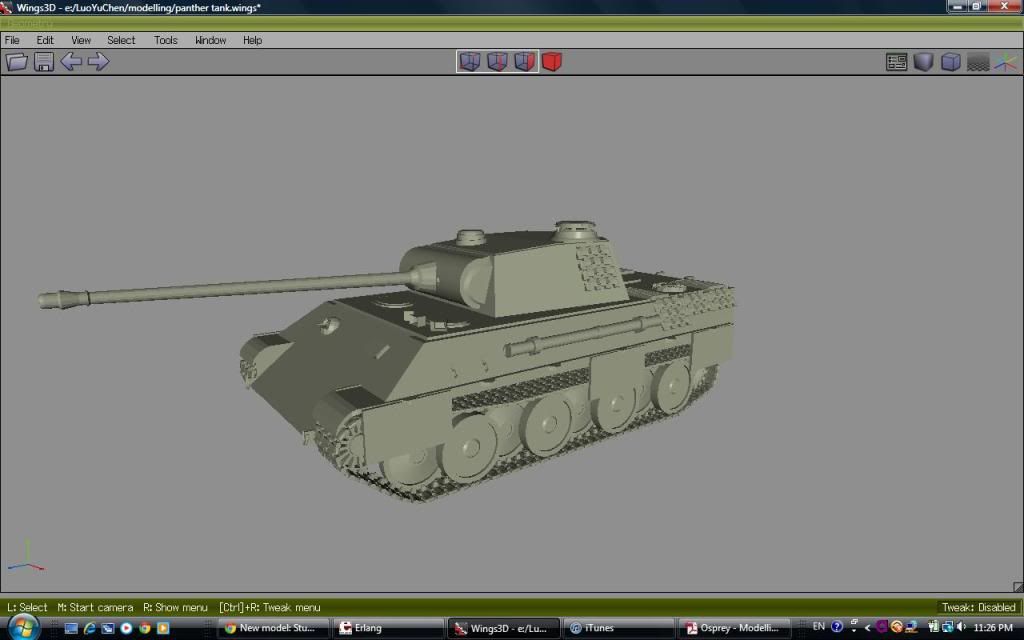
And thanks for the link. I'll give it a good look on during the weekend.
If this gets better and you agree, it would be cool to use it for Project Normandy

We need a german heavy tank to fight the Pershing we got.
Re: Show your models thread...(IMAGE HEAVY)
Posted: 2012-03-30 01:47
by Tim270
Think I am near done with this
http://i.imgur.com/crhna.jpg
Not my model or uv map, just texture. (model is by Harry)
Re: Show your models thread...(IMAGE HEAVY)
Posted: 2012-03-30 17:49
by Wakain
'[R-CON wrote:Tim270;1751153']Think I am near done with this
http://i.imgur.com/crhna.jpg
Not my model or uv map, just texture. (model is by Harry)
impressive iron/metal you've got there
Posted: 2012-04-03 13:43
by ubermensche
Pvt.LHeureux wrote:If this gets better and you agree, it would be cool to use it for Project Normandy
We need a german heavy tank to fight the Pershing we got.
I sure wouldn't mind seeing it in there. But I'm quite busy for now and I won't have much time till mid-may. I can work it more on it after.
And you guys put a Pershing into PR:N? o.O
Re: Show your models thread...(IMAGE HEAVY)
Posted: 2012-04-05 18:54
by Pvt.LHeureux
Yes we have a Pershing but we are looking for a bigger german tank (like a panther) to fight the Pershing.
Re: Show your models thread...(IMAGE HEAVY)
Posted: 2012-04-07 07:55
by Doc.Pock
give the germans leopard 2s lol

Re: Show your models thread...(IMAGE HEAVY)
Posted: 2012-04-07 21:15
by ubermensche
Pvt.LHeureux wrote:Yes we have a Pershing but we are looking for a bigger german tank (like a panther) to fight the Pershing.
I'm interested. Check your PMs.
Re: Show your models thread...(IMAGE HEAVY)
Posted: 2012-04-08 23:22
by seb120
Decided to paint a metal texture, then i needed a model for it so i made this on the quicks this afternoon. It's a Polish Nadziak used by hussars (aka horsman's pike/long war hammer)
Left is low poly right is high poly. 801 tris

Full:

Re: Show your models thread...(IMAGE HEAVY)
Posted: 2012-04-11 03:01
by Tim270
Can I ask what position you fill on the ICV team Seb? Do you have a folio link? Just interested

Re: Show your models thread...(IMAGE HEAVY)
Posted: 2012-04-12 01:22
by seb120
[R-CON]Tim270 wrote:Can I ask what position you fill on the ICV team Seb? Do you have a folio link? Just interested
I mostly do weapons and textures, but I've been delving into environmental art. No folio for me since I'm not a pro or plan to get a job from this, i might just make a deviant art account or something free like that to display my work when we reveal some of the things I've made.
Re: Show your models thread...(IMAGE HEAVY)
Posted: 2012-04-13 00:33
by Tim270
Fair enough
say hi to TrampledUnderFoot for me

Re: Show your models thread...(IMAGE HEAVY)
Posted: 2012-04-14 00:32
by Rissien
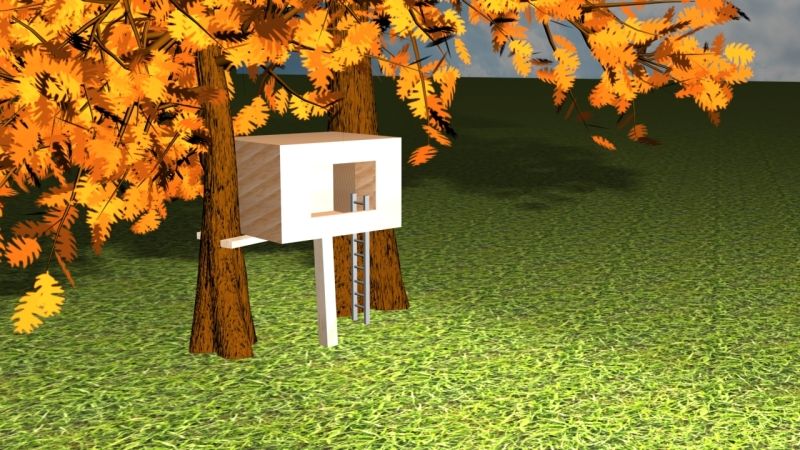
Directed to this thread since I ddnt know about it and posted in the photoshop thread. In a 3d Modeling class right now, doing a treehouse. I am being lazy and went with a more simple one youd find in anyones backyard unlike a certain someone in our class practically making a palace lol. Still have alot to learn but weve gone over the basics so far, the modeling itself, adding textures, lighting, etc. Heres what ive done, well be moving on to something else next week.
Re: Show your models thread...(IMAGE HEAVY)
Posted: 2012-04-17 12:55
by Mineral
I am new to all this, but I thought, wouldn't it be cool if my own house was in PR? So I tried it out, pretty much done with the model. But I'm not sure if it is PR material
(amount of tricounts)


the inside is also done, but was hard to show. Just some basic walls and stairs.
is this to much?
poly:971
tris:1.703
vert: 1.170
now I want to learn how to texture and code this model
but first want to make sure if it's up to any good.
Re: Show your models thread...(IMAGE HEAVY)
Posted: 2012-04-17 22:30
by CommunistComma
Large image:
http://i.imgur.com/u5Brv.jpg

God I hate Photoshop. Really want to get this textured and ingame though.
Re: Show your models thread...(IMAGE HEAVY)
Posted: 2012-04-17 22:39
by Tim270
Post up some wires if you want crits
Re: Show your models thread...(IMAGE HEAVY)
Posted: 2012-04-17 22:47
by CommunistComma
Re: Show your models thread...(IMAGE HEAVY)
Posted: 2012-04-17 23:14
by Tim270
http://i.imgur.com/hz6jP.jpg
Red, I would cut down the tri count mainly as you can achieve the same result with less triangles.
Yellow, is not 100% necessary, but it will fix the z-fighting that will happen from having interesting faces that are not welded. Although something to consider later on imo.
The nasty black shadows on some of the faces are down to the smoothing groups. Usually it is best to 'clear all' or not give it any, but if you give multiple faces smoothing groups over a angle of 180 degress you will get these black shadows. If you for example use smoothing groups 1 and 2 on neighbouring faces, they will blend with each others smoothing, using 1 and 3 for example will give you a split between smoothing groups.
It is quite hard to view the fuselage from wire only, it is best to do wires ontop of the faces like in your first shot. One thing to note however, usually vehicles are set up with 2 models. One for the interior and one for the exterior. You can have one single model, but it usually means having a low quality inside. What is best at this point is to make the inside it's own more detailed mesh and for the exterior model just have a simple box for example inside.
Hope that helps. Feel free to pm me with any questions.


