Basically HP Modelling stands for High Poly Modelling, aka Sub Division Modelling which is a special type of modelling method where you create a basic structure of a model, then add a turbo-smoothing (or similar) modifier to the object and it can make a high poly model from that basic structure like I did for the basic fore grip one I showed on the last page:
Basic structure:

With 4 iterations of Turbo Smoothing:


This model however is far too high poly (hence the name) to be used as an ingame model, and is only used to bake normals onto a LP (Low Poly) Model, like this wheel here where the left is the high poly model, middle is the low poly model with the normal map applied from the high poly to low poly bake (+ AO and diffuse and spec etc, although diff and spec would have been made by hand in this case) and then left is the low poly model with textures in edged framed mode:

Taking another example from Lucky's Tigercat Missile:
https://www.realitymod.com/forum/f388-p ... f-wip.html
Here is the HP model of the missile, and second pic of the HP launcher with missiles:


LP Model of the missile which is around 260 tris:


The Normal map baked from the HP model to the LP model:

LP Model with Normals baked on and just the normals and low poly model showing:

And the LP Missile with normals and textures on in the Editor which is pretty much how it will also look ingame:


As you can see it would have only been able to get the proper shape of the missile, + all the details the normals give too with either spending a lot of tris on the low poly model, or with a normal map.
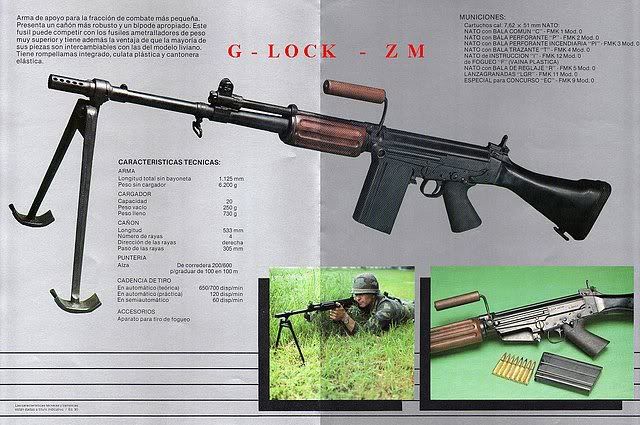
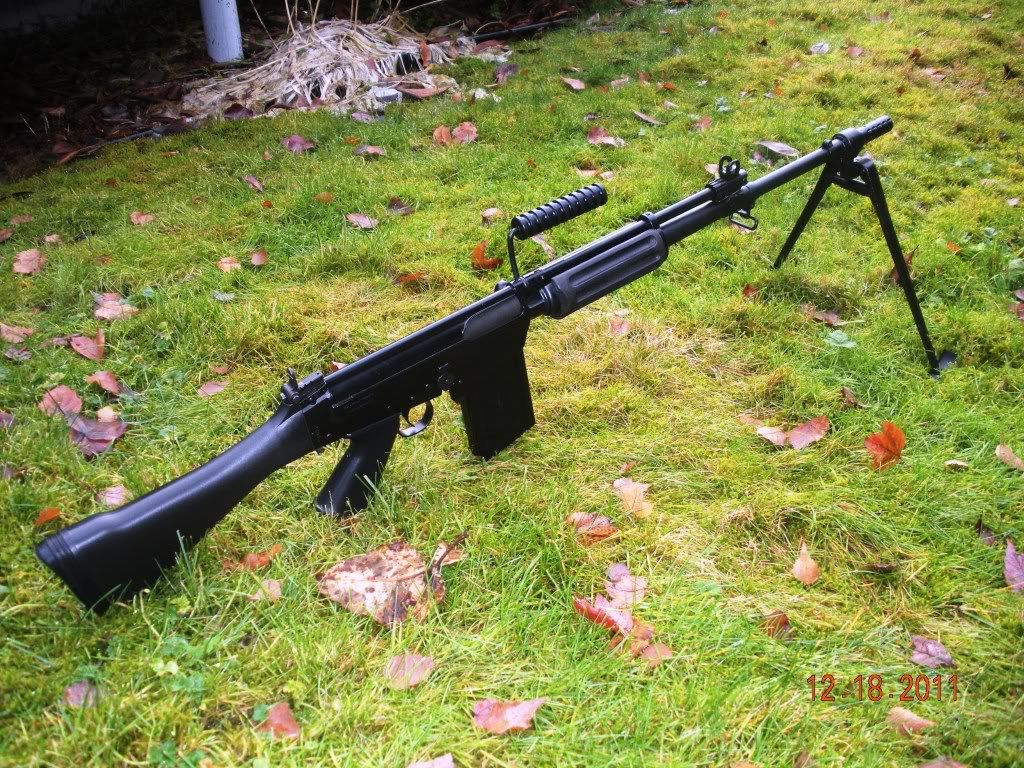
Going back to your FM FAP, I would only really suggest doing this on your fore grip as its not really worth it for the rest of it since it doesn't have any details that would be that much improved by HP modelling and any other normal details other than the ones on the fore grip can be quite easily done by hand.
As such for the basic LP (Low Poly), 1st person model for your fore grip is to have something along the lines of this for the slits:

Which then just using low poly smoothing looks nothing like it should:

But when we bake the normal from the HP model onto it quickly with a basic UV you can see with just the normal map texture showing on the surface where the details are baked:

And in a render it looks like pretty much the same as the high poly model, but only costing 204 tris:

And even when looking down the slit you can still see a bit of mesh depth from the low poly slit in the model, although a bit of a funny bit on the end in this render but should be fine ingame:

So ye to summarise, for now, just make the slits on your Fore Grip on this model like the ones on my Low Poly model above and then we can look into making a high poly model later

Moving on to the cylinder after your fore grip, you can have one welded on (ie, part of the same mesh) while also having fewer sides. This is a really important part of optimization a lot of people miss and especially in this case since you won't be able to see this clyinder much behind the fore grip in 1st person being quite a few needless tris they have to render.
This is pretty pretty much what you have now:

But you can easily 1/2 the tris, or more by just selecting every other side's edge like so:

And then hitting the "Collapse" Button will then collapse each of the selected edges down, resulting in 1/2 the sides it had before:

You can also repeat this process over and over again until you get to the level your looking for:


And you can even select every one in three sides to result in a 1/3 loss of sides/tris as well as other methods of reducing the amount of sides these cylinders have, while keeping them part of the same mesh:


Moving onto the cylinder above the fore grip, looking at the new refs I don't think its a good idea to weld it onto the fore grip, since the fore grip slightly wraps around it with quite a big gap between the fore grip sides and the cylinder, and I think this would actually be worth modelling in and with the gap, you won't get any significant zfighting in first person at least and can possibly look at welding it up in 3p.
Other than those points, and the points I've made before its looking good so far!

BTW to improve the textures in your viewports go to Customize > Preferences and go to the Viewports tab and hit Config Driver:

Then match these settings in the popup window and the texture on the main part of the weapon will look much better


Hope that helps and keep up the good work!


