
Done. Can i start unwraping model?'[R-DEV wrote:Rhino;2169623']looks good, main thing I would say from those pics is the last one here: http://i.imgur.com/eO0pqmc.png
That cylinder sticking though I would just remove and do it though normal maps, it will just zfight and isn't worth the tris and especially not the UV space which 90% of it isn't even seen.
[WIP] [Weapon] M2 Carl Gustaf
-
w0lf3k
- PR:BF2 Developer
- Posts: 149
- Joined: 2015-12-09 11:35
Re: [WIP] [Weapon] M2 Carl Gustaf
-
Rhino
- Retired PR Developer
- Posts: 47909
- Joined: 2005-12-13 20:00
Re: [WIP] [Weapon] M2 Carl Gustaf
Best to send it my way first to give it one last check 
Also, ensure the thing can be fully animated with everything that should move, can move, and doesn't expose any missing faces etc when it does.
You may also want to consider when UVing this, on having a bunch of faces that will never be seen in 1st person view, UVed onto another sheet and when it comes to exporting the model, deleting those faces and those faces only being used for the 3rd person model baking process. This wouldn't just cut down on tris but would also allow for a much higher detail texture with not having tot UV all those unseen sides to the main 1p sheet. Problem with this is its a bit tricky to work out what faces you are not ever going to see from 1p and can limit options for animations.
Last edited by Rhino on 2017-07-25 17:51, edited 1 time in total.

-
Rhino
- Retired PR Developer
- Posts: 47909
- Joined: 2005-12-13 20:00
Re: [WIP] [Weapon] M2 Carl Gustaf
Sorry for the delay, taking a look at this now

First thing is this bit on top of the scope, the smoothing is kinda screwed up. TBH The only way you're going to get a decent transition, without spending lots of tris, is to make a high poly model of this part of the scope (possibly others too) and bake the normals from the high poly to the low poly. Would also mean you can remove a bunch of those extra edges you've put in to try and control the smoothing but aren't really enough to do so really:

TBH your going to need a few more edges on this chamfer to control the smoothing better here, or like above, control the smoothing with a HP normal bake. Also I take it that face on the front is just a smoothing error from the backport? If not, needs a chamfer there to control the smoothing too.

Is this back of this below the knob meant to be so low like this? Don't have any refs to hand to check it against but just looks a little odd is all?

I'm not sure if these indents here in the knobs are really worth modelling in, since there is nothing to silhouette them against to really notice them over a normal map which I think in this case, could work just as well with fewer tris and more space for this sides UV.

I think the front end of your scope here also needs to be bumped up to 32 sides as it is pretty clear from the 1st person position that it is quite blocky right now when silhouetted against the surroundings, especially when compared with the cap under it.


Need to define your edges more, like on the inside of this knob by the scope, the edges aren't as they should be:


This little cylinder here isn't really worth it and will likely zfight, would do it though normals.

This little indent here is kinda a bit low poly tbh. Would do it more like so, possibly with also with a HP Normal Bake:


I would have the knob welded to this side fully, with also deleting its unseen faces. Right now with it like that you're wasting quite a lot of UV space which is more important than the tris saved.

Would also remove this hole here, isn't going to be seen other than maybe for a split second during the reload animation if someone is really looking for it and can be done with normal and fake shadow

This indent isn't needed, hardly going to be seen and can be done with normals:

Bunch of hidden tris here on both sides of this attachment groove, best to remove them and weld them up as the scope is never going to be detached from the rail ingame and just wasting tris and quite a bit of UV space.

These geospheres should be made rounder to match the roundness of the tube

Would fold these strap attachments down and think might be worth making them rounder too.

Strap bases clip quite a bit into the main mesh, wasting UV area, best to minimise UV wastage as much as possible.

Should also remove the hole though the strap attachment base, no one will miss it, can do it though normals and 2D shadow on the texture, and you can also then remove these sides of the strap ring, both saving a few tris and UV space


Can remove these loops saving a few tris.

This bit is clipping though the side of the bit its in, should bring it out to rest it just on it (saving a little UV space) and would also make it a bit smaller too, also possibly optimizing the outside too a bit

Can remove this edge on the back iron sight:


This rod clips though quite a bit of mesh. Worth cutting it up so you only have the bits that are visible there, saving UV space even if it is at the cost of a few extra tris, and also preventing possible zfighting.
That is unless we have adjustable sights for this and can make them move accordingly, so ye, actually keep it just encase we can/do.

You should weld up this box here to the scope mount:

This is a bit odd how the scope mount has more tris than this, and it levitates in it? Would weld it up to it fully tbh, unless you have refs showing otherwise?


You should weldt these together, will save quite a bit of UV space.

Missing face here, although might be best to move it so its fully in that box?


Can delete the hidden faces for these blocks:

This bit dosen't really need this much detail, could collapse a few of those tiny chamfers etc?
A few hidden faces here you could remove, possibly weld up these attachements too?


You could possibly chamfer this band a bit to make it a smoother transtition to the padding? Possibly have it start a bit further back too?
Other than those points, and the smoothing which I've not noted as they are most likley backporting errors, its looking really good, keep up the good work!
First thing is this bit on top of the scope, the smoothing is kinda screwed up. TBH The only way you're going to get a decent transition, without spending lots of tris, is to make a high poly model of this part of the scope (possibly others too) and bake the normals from the high poly to the low poly. Would also mean you can remove a bunch of those extra edges you've put in to try and control the smoothing but aren't really enough to do so really:
TBH your going to need a few more edges on this chamfer to control the smoothing better here, or like above, control the smoothing with a HP normal bake. Also I take it that face on the front is just a smoothing error from the backport? If not, needs a chamfer there to control the smoothing too.
Is this back of this below the knob meant to be so low like this? Don't have any refs to hand to check it against but just looks a little odd is all?
I'm not sure if these indents here in the knobs are really worth modelling in, since there is nothing to silhouette them against to really notice them over a normal map which I think in this case, could work just as well with fewer tris and more space for this sides UV.
I think the front end of your scope here also needs to be bumped up to 32 sides as it is pretty clear from the 1st person position that it is quite blocky right now when silhouetted against the surroundings, especially when compared with the cap under it.
Need to define your edges more, like on the inside of this knob by the scope, the edges aren't as they should be:
This little cylinder here isn't really worth it and will likely zfight, would do it though normals.
This little indent here is kinda a bit low poly tbh. Would do it more like so, possibly with also with a HP Normal Bake:
I would have the knob welded to this side fully, with also deleting its unseen faces. Right now with it like that you're wasting quite a lot of UV space which is more important than the tris saved.
Would also remove this hole here, isn't going to be seen other than maybe for a split second during the reload animation if someone is really looking for it and can be done with normal and fake shadow
This indent isn't needed, hardly going to be seen and can be done with normals:
Bunch of hidden tris here on both sides of this attachment groove, best to remove them and weld them up as the scope is never going to be detached from the rail ingame and just wasting tris and quite a bit of UV space.
These geospheres should be made rounder to match the roundness of the tube
Would fold these strap attachments down and think might be worth making them rounder too.
Strap bases clip quite a bit into the main mesh, wasting UV area, best to minimise UV wastage as much as possible.
Should also remove the hole though the strap attachment base, no one will miss it, can do it though normals and 2D shadow on the texture, and you can also then remove these sides of the strap ring, both saving a few tris and UV space
Can remove these loops saving a few tris.
This bit is clipping though the side of the bit its in, should bring it out to rest it just on it (saving a little UV space) and would also make it a bit smaller too, also possibly optimizing the outside too a bit
Can remove this edge on the back iron sight:
This rod clips though quite a bit of mesh. Worth cutting it up so you only have the bits that are visible there, saving UV space even if it is at the cost of a few extra tris, and also preventing possible zfighting.
That is unless we have adjustable sights for this and can make them move accordingly, so ye, actually keep it just encase we can/do.
You should weld up this box here to the scope mount:
This is a bit odd how the scope mount has more tris than this, and it levitates in it? Would weld it up to it fully tbh, unless you have refs showing otherwise?
You should weldt these together, will save quite a bit of UV space.
Missing face here, although might be best to move it so its fully in that box?
Can delete the hidden faces for these blocks:
This bit dosen't really need this much detail, could collapse a few of those tiny chamfers etc?
A few hidden faces here you could remove, possibly weld up these attachements too?
You could possibly chamfer this band a bit to make it a smoother transtition to the padding? Possibly have it start a bit further back too?
Other than those points, and the smoothing which I've not noted as they are most likley backporting errors, its looking really good, keep up the good work!
Last edited by Rhino on 2017-07-27 17:13, edited 1 time in total.
-
w0lf3k
- PR:BF2 Developer
- Posts: 149
- Joined: 2015-12-09 11:35
Re: [WIP] [Weapon] M2 Carl Gustaf
I've done all of this optimization except this:
- I though ironsight will move on this "rail" depends from target distance?
-
Well, atm it looks like this.


- And this
ATM the only highpoly what i've done is tatra 813 wheel. I keep practicing in HP Hard surfaces, but still have lot topology issues. ;( Also this loops more about keep shape of scope, instead of support smooth.
p.s. Where is best way to bake normals for BF2 engine and what render use?
- I though ironsight will move on this "rail" depends from target distance?
-
Well, atm it looks like this.
- And this
ATM the only highpoly what i've done is tatra 813 wheel. I keep practicing in HP Hard surfaces, but still have lot topology issues. ;( Also this loops more about keep shape of scope, instead of support smooth.
p.s. Where is best way to bake normals for BF2 engine and what render use?
Last edited by w0lf3k on 2017-07-27 11:44, edited 1 time in total.
-
Rhino
- Retired PR Developer
- Posts: 47909
- Joined: 2005-12-13 20:00
Re: [WIP] [Weapon] M2 Carl Gustaf
Nice workw0lf3k wrote:I've done all of this optimization
Ye I edited in afterwards:w0lf3k wrote:- I though ironsight will move on this "rail" depends from target distance?
But I stupidly put it in the wrong place and not part of this bit heheThat is unless we have adjustable sights for this and can make them move accordingly, so ye, actually keep it just encase we can/do.
So ye you're right, keep it.
Ye that works too, although if you find you need to save a few tris later you could remove it but should be fine.w0lf3k wrote:
Well, atm it looks like this.
Ye, we can help you with making a decent HP model etc, just at this stage need to decide on how you're going to do it.w0lf3k wrote:- And this
ATM the only highpoly what i've done is tatra 813 wheel. I keep practicing in HP Hard surfaces, but still have lot topology issues. ;( Also this loops more about keep shape of scope, instead of support smooth.
p.s. Where is best way to bake normals for BF2 engine and what render use?
But ye on the LP model, if you were going to do a HP bake then you can remove these edge loops:

And ye, here is a really quick HP model I made from your LP model just for this bit, possibly needs tweaking (mainly more loops around the scope chamfers) and I wasn't going off any refs but you get the idea:


Download: http://files.realitymod.com/resources/M ... -07-17.zip
Oh and as for the best way, 3DsMax bake to texture is the best way, plenty of tuts out there thou a little tricky finding a really good one
Last edited by Rhino on 2017-07-27 17:52, edited 1 time in total.
-
w0lf3k
- PR:BF2 Developer
- Posts: 149
- Joined: 2015-12-09 11:35
Re: [WIP] [Weapon] M2 Carl Gustaf
What options i have? I mean can i just use HP baking only on problem parts instead of whole mesh?[R-DEV]Rhino wrote: Ye, we can help you with making a decent HP model etc, just at this stage need to decide on how you're going to do it.
p.s. I tried to make HP from LP, it looks good, but topology awful


Last edited by w0lf3k on 2017-07-29 15:59, edited 6 times in total.
-
Rhino
- Retired PR Developer
- Posts: 47909
- Joined: 2005-12-13 20:00
Re: [WIP] [Weapon] M2 Carl Gustaf
yes.w0lf3k wrote:What options i have? I mean can i just use HP baking only on problem parts instead of whole mesh?
.
-
w0lf3k
- PR:BF2 Developer
- Posts: 149
- Joined: 2015-12-09 11:35
Re: [WIP] [Weapon] M2 Carl Gustaf
Can i start unwraping? 
-
Rhino
- Retired PR Developer
- Posts: 47909
- Joined: 2005-12-13 20:00
Re: [WIP] [Weapon] M2 Carl Gustaf
Should be able to now ye, went over the model pretty thoroughly last time and any other problems you should hopefully find while UVing or won't be too hard to fix later.
-
w0lf3k
- PR:BF2 Developer
- Posts: 149
- Joined: 2015-12-09 11:35
Re: [WIP] [Weapon] M2 Carl Gustaf
Forget to ask about this

If i'm baking only part of mesh, how to avoid this pink fills outside markers? I miss some settings in render or i need to fix this in Photoshop?
If i'm baking only part of mesh, how to avoid this pink fills outside markers? I miss some settings in render or i need to fix this in Photoshop?
-
Rhino
- Retired PR Developer
- Posts: 47909
- Joined: 2005-12-13 20:00
Re: [WIP] [Weapon] M2 Carl Gustaf
I'm guessing the pink is the "Ray Miss Check", which you can turn off in the Render to Texture / Projection Options:

But if your getting these errors its probably down to your cage not being big enough or something like that.
It is also worth noting that you should only have the faces on the LP model that you want to bake, having all the other faces there will just mean you have lots of baking area you don't need.
Also before you begin fully baking textures etc, best you post your UVW maps here so we can see if there are any issues with them as otherwise any work you do will need to be totally redone if they need to be repacked or w/e.
-
w0lf3k
- PR:BF2 Developer
- Posts: 149
- Joined: 2015-12-09 11:35
Re: [WIP] [Weapon] M2 Carl Gustaf
Of course![R-DEV]Rhino wrote: Also before you begin fully baking textures etc, best you post your UVW maps here so we can see if there are any issues with them as otherwise any work you do will need to be totally redone if they need to be repacked or w/e.
-
Captain Fubar
- Posts: 67
- Joined: 2016-08-09 05:52
Re: [WIP] [Weapon] M2 Carl Gustaf
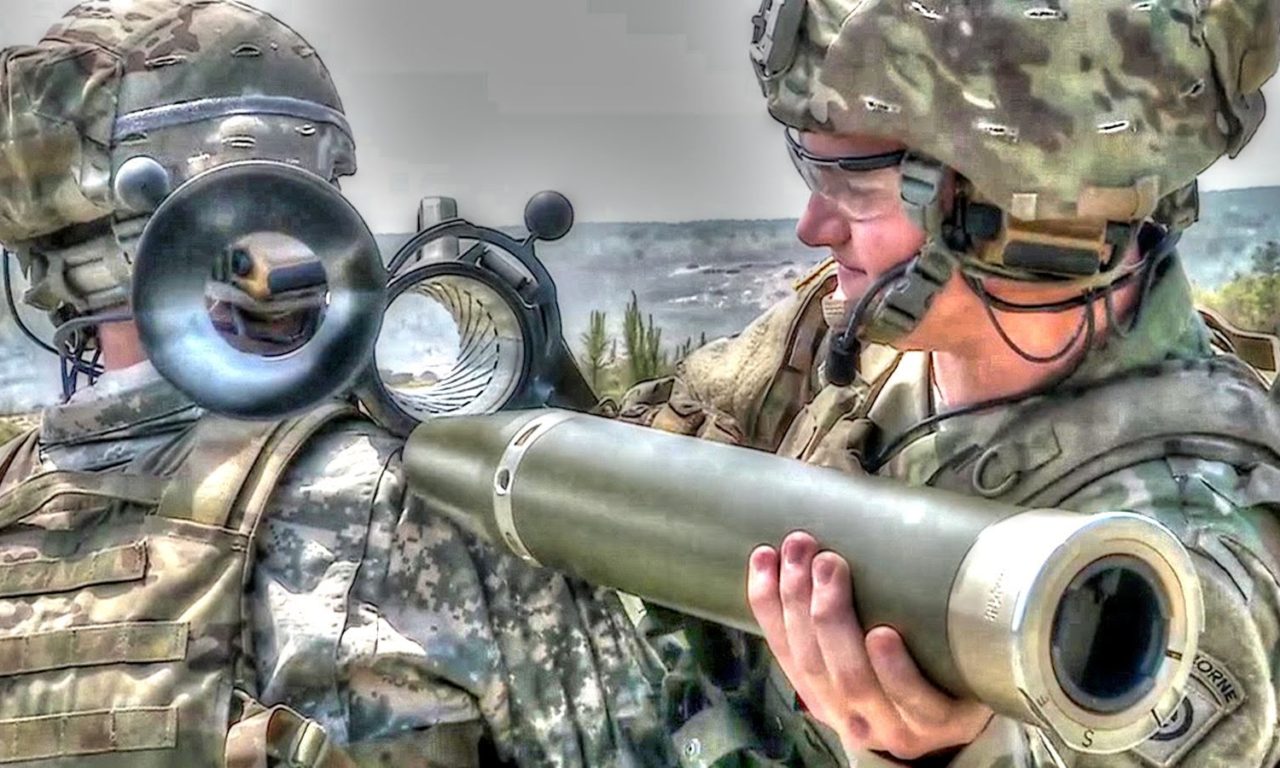
would love to see this as standard LAT kit for Canada
Yep and that's an enemy jet coming up above us dropping bombs, we're dead, we are de-
-
Rhino
- Retired PR Developer
- Posts: 47909
- Joined: 2005-12-13 20:00
Re: [WIP] [Weapon] M2 Carl Gustaf
It's a bit too powerful for a LAT kit but the Canadians will be getting the CG once it's done naturally.Captain Fubar wrote:would love to see this as standard LAT kit for Canada
-
w0lf3k
- PR:BF2 Developer
- Posts: 149
- Joined: 2015-12-09 11:35
Re: [WIP] [Weapon] M2 Carl Gustaf
Some previews of seams and UV.

*shells at bottom is overlapped parts.


*shells at bottom is overlapped parts.
-
Rhino
- Retired PR Developer
- Posts: 47909
- Joined: 2005-12-13 20:00
Re: [WIP] [Weapon] M2 Carl Gustaf
Well first of all your packing could be better but in my books, packing should be done after everything is UVed to the same scale, even if some bits will be downsized later because they are hidden or w/e, as this gives the most flexibility especially when it comes to fixing and reworking the UVs. So for now, I would forget about packing and just focus on getting things UVed.
Now for the inside of the tube on the 1p UVs, I know I did suggest the option of adding a loop down the middle and then collapsing the middle of the UV down like you've done but I wouldn't do this for the 1st person model as the front end really doesn't need any detail at all as the player will never see the front end of the model in 1st person, let alone look down the front end of the tube since this weapon is breech loaded (from the back), unlike say the RPG which is muzzle loaded (from the front).
As such I would really go for this UV for the 1st person model, where the rear of the inside has all the detail and the front has very little:

And then for the 3rd person model, I would do the opposite like so, but also with the rear compartment having its back in higher detail for when another player looks in behind the weapon: http://i.imgur.com/9FAWOV0.jpg
BTW I would also do the rifling on the inside of the barrel by using the multiple springs and just baking its normals and shadows into it and doing the rest by hand, and this will also work perfectly with the odd UV shape which doing by hand will be next to impossible.
https://www.youtube.com/watch?v=G2dXlJP9gQU
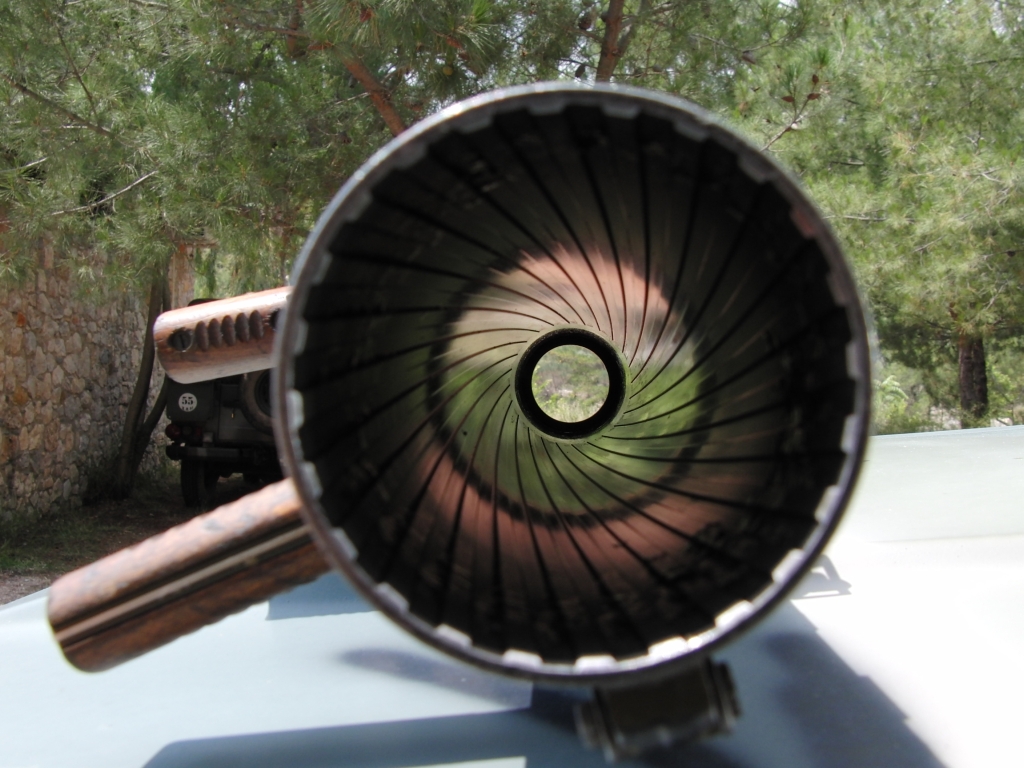
Also worth noting that the back exhaust thing's inside is basically just a flat, shiny black so it's UV doesn't need to be very big:

As for your overlapped parts, you need to be careful with what and how you overlap. For example, those geo-spheres look both overlapped, and not only that but it also looks like you've overlapped both halves? This isn't a good idea as the shadowing for each, and especially each half is very different. You could get away with having both spheres sharing the same UV if you had them at the same orientation to the UV as to where they share the most common shadows etc, which they don't now, both are straight vertical, but having both halves share the same UV isn't good since the left has quite a different shadow from the right. I also would do their UVs quite differently so they didn't have so many seams and you want to hide the seams away from where the player will most commonly see them from. Same goes for the other parts naturally.
Now for the inside of the tube on the 1p UVs, I know I did suggest the option of adding a loop down the middle and then collapsing the middle of the UV down like you've done but I wouldn't do this for the 1st person model as the front end really doesn't need any detail at all as the player will never see the front end of the model in 1st person, let alone look down the front end of the tube since this weapon is breech loaded (from the back), unlike say the RPG which is muzzle loaded (from the front).
As such I would really go for this UV for the 1st person model, where the rear of the inside has all the detail and the front has very little:
And then for the 3rd person model, I would do the opposite like so, but also with the rear compartment having its back in higher detail for when another player looks in behind the weapon: http://i.imgur.com/9FAWOV0.jpg
BTW I would also do the rifling on the inside of the barrel by using the multiple springs and just baking its normals and shadows into it and doing the rest by hand, and this will also work perfectly with the odd UV shape which doing by hand will be next to impossible.
https://www.youtube.com/watch?v=G2dXlJP9gQU
Also worth noting that the back exhaust thing's inside is basically just a flat, shiny black so it's UV doesn't need to be very big:
As for your overlapped parts, you need to be careful with what and how you overlap. For example, those geo-spheres look both overlapped, and not only that but it also looks like you've overlapped both halves? This isn't a good idea as the shadowing for each, and especially each half is very different. You could get away with having both spheres sharing the same UV if you had them at the same orientation to the UV as to where they share the most common shadows etc, which they don't now, both are straight vertical, but having both halves share the same UV isn't good since the left has quite a different shadow from the right. I also would do their UVs quite differently so they didn't have so many seams and you want to hide the seams away from where the player will most commonly see them from. Same goes for the other parts naturally.
-
w0lf3k
- PR:BF2 Developer
- Posts: 149
- Joined: 2015-12-09 11:35
Re: [WIP] [Weapon] M2 Carl Gustaf
This all have same scale.[R-DEV]Rhino wrote:Well first of all your packing could be better but in my books, packing should be done after everything is UVed to the same scale, even if some bits will be downsized later because they are hidden or w/e, as this gives the most flexibility especially when it comes to fixing and reworking the UVs. So for now, I would forget about packing and just focus on getting things UVed.
Halves? Em... How better to cut geosphere for UV?[R-DEV]Rhino wrote: As for your overlapped parts, you need to be careful with what and how you overlap. For example, those geo-spheres look both overlapped, and not only that but it also looks like you've overlapped both halves?
Now:

-
Rhino
- Retired PR Developer
- Posts: 47909
- Joined: 2005-12-13 20:00
Re: [WIP] [Weapon] M2 Carl Gustaf
cool but when it comes to packing, especially for the 1st person model/uv/texture, you will want to scale down the bits that won't get seen and/or are far away from the players view and as such, don't need such detail.w0lf3k wrote:This all have same scale.
Ah ok from screenshot before it looked like they were UVed differently.w0lf3k wrote:Halves? Em... How better to cut geosphere for UV?
Now:
Ye that UV is good (other than the overlapping of the two spheres), other than the seam should be on the opposite side since these knobs, for the lack of a better word, will only really be seen when reloading (from 1st person) and right now the seam is right in front of where the player will be looking on them and really should be on the opposite or underside where they won't be seen so easily.
-
w0lf3k
- PR:BF2 Developer
- Posts: 149
- Joined: 2015-12-09 11:35
Re: [WIP] [Weapon] M2 Carl Gustaf
Yea, i'll rotate them for hiding those seams.
Also, i scale those parts by 50%. What else should i look for scaling? i'm thinking about increasing ironsight, maybe

Also, i scale those parts by 50%. What else should i look for scaling? i'm thinking about increasing ironsight, maybe